Apple introduced Live Photos as a fun feature on the iPhone 6s several years ago, creating three-second clips from static photos by capturing what happens in the 1.5-second window before and after you tap the shutter button.
This option has been a mainstay of every iPhone model since then, and even if you are new to the iPhone, you have probably used it already because by default, it is turned on, you need to take specific steps to disable it if you want to go back taking regular photos.
There are no major disadvantages to keeping Live Photos active. You can post them as a regular, static picture just like any other image, and while they will take up more memory on your iPhone than before, it is less since Apple went to the efficient HEIC format in 2017.
Although Live Photos used to be almost two times larger than the same static JPEG file, today, you will usually see a 25% difference on average. On the other hand, it is relatively easy to share a static version of the photo anywhere you can post or send a regular image, but sharing the animated part requires more effort.
Read Also: How to Turn off live Photos in 2024 – Check out Full Guide
Of course, Live Photos will work fine when you share them within Apple’s ecosystem, so sending them via iMessage or a Shared Photo Album to a friend with an iPhone, iPad or Mac is no issue.
Apple has also opened up its Live Photos technology to third-party websites, and social media platforms such as Facebook, Instagram, and Twitter have adopted this functionality. Google Photos has supported Live Photos for years, and it can even be improved on your behalf.
- Saving a Live Photo as a video
- How to use Loop, Bounce, or Long Exposure with Live Photos
- People May Ask
- Why can’t I save a live photo as a video on my iPhone?
- How do I turn a live photo into a GIF or video on my iPhone?
- Can a live photo be turned into a video?
- What is the procedure for making a video on my iPhone?
Saving a Live Photo as a video
The process of making a video out of a Live Photo varies slightly according to which iOS version you are using. The latest one, iOS 16, runs on any iPhone that has been released in the last six years, whether it is iPhone 14 or iPhone 14 Pro or a seven-year-old iPhone 8. On the other hand, if you are still using an iPhone 6s or iPhone 7, which supports Live Photos, then you will be restricted to iOS 15.
Luckily, the procedure is almost the same for both versions, except that one option is slightly different in location on those older models.
- On your iPhone, open the Photos app
- Choose the Album icon at the bottom.
- Scroll down and choose Live Photos from the list under Media Types. This will display a gallery view of only the Live Photos that are stored in your photo library. You can navigate here just as you would the main Library view, including pinching in and out on the grid.
- Open a Live Photo from the gallery by selecting it.
- On your selected Live Photo, tap the three-dot More icon at the top right of the screen. You will see a drop-down menu that has more choices.
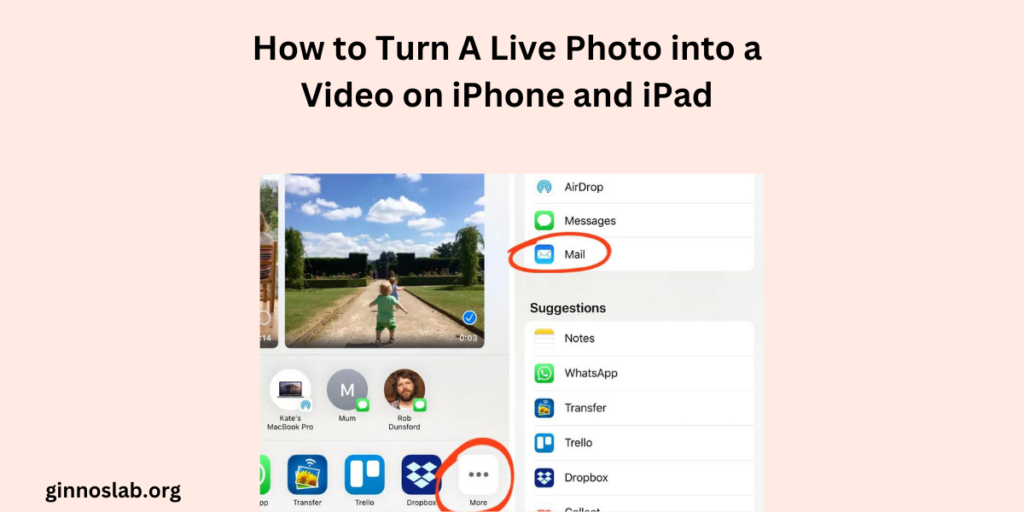
If you are using iOS 15, choose the Share button to open up the standard iOS share sheet.
- From the pop-up menu (in iOS 16) or the share sheet (iOS 15), choose Save as Video. Your iPhone will copy the Live Photo as a video clip.
- If the “Save as Video” option does not show up on the menu or share sheet when you have a Live Photo selected, this is probably because either you have turned off the Live Photo feature or enabled an effect mode such as a Loop or Bounce (which we will discuss in the last section). For the live photos with effects, the video converter cannot convert them to videos, and you have to restore the photo to a regular live photo.
This can be done by clicking on the Live button in the top left corner of the image (which may also say Loop, Bounce, or Long Exposure) and then setting it back to Live from the drop-down menu that appears.
- The same metadata as the original live photo, such as date, time and location information, will be saved with the video clip. This implies that it will be placed alongside the original Live Photo, which may not necessarily be at the end of your Library timeline unless you are converting one you have just taken.
- The easiest way to find the saved video is by going back to the Albums view and checking in the Recents album, where photos are organized according to their actual addition date rather than internal timestamps.
Related Articles
| how to use your iPhone’s clock as a sleep timer |
| How to block websites on iPhone and iPad |
| How to turn on Do Not Disturb on iPhone |
| How to add music to a video on iPhone |
How to use Loop, Bounce, or Long Exposure with Live Photos
You can also apply special effects to your Live Photos to spice it up a little. Apple currently offers three: Loop, Bounce, and Long Exposure.
The loop will make your Live Photo play as a continuous loop, and Bounce makes the Live Photo play in reverse and then forward continuously. As the name implies, Long Exposure shows your Live Photo as a static image that combines the three seconds of video to make it look like a photo captured with an extremely long shutter speed.
While these settings do not allow Live Photos to be converted into videos using the tools built into the Photos app, you will still be able to view them on your iPhone and other Apple devices as well as share them with friends and social media services that support Live Photos. Here are the steps:
- Open the Photos app and select a Live Photo.
- With the chosen image open, click on the Live button in the upper left corner and select Loop, Bounce, or Long Exposure from the drop-down menu. Alternatively, you can choose Off if you want the Live Photo to show up as a still picture.
People May Ask
Why can’t I save a live photo as a video on my iPhone?
As live photos with effects cannot be converted to videos, you will have to reset the photo to a regular live photo. This can be achieved by clicking on the Live button in the top left corner of the photo (which may also read Loop, Bounce or Long Exposure) and setting it back to Live from the menu that appears.
How do I turn a live photo into a GIF or video on my iPhone?
Open the Live Photo > tap on the “Live Photo” icon in the top-left corner and select Bounce > click Share button > save to Files on my iPhone. Finally, the Live Photo will be transformed into a looping video—a sort of animated GIF.
Can a live photo be turned into a video?
In the Albums section of the Photos app, Scroll down to see Media Types, and then tap Live Photos. Click to choose a Live Photo. To the top right, click Save as Video.
What is the procedure for making a video on my iPhone?
Navigate to Settings > Camera and tap Record Video. Choose from the list of video formats and frame rates that your iPhone can handle. Note: Higher frame rates and resolutions lead to bigger video files.